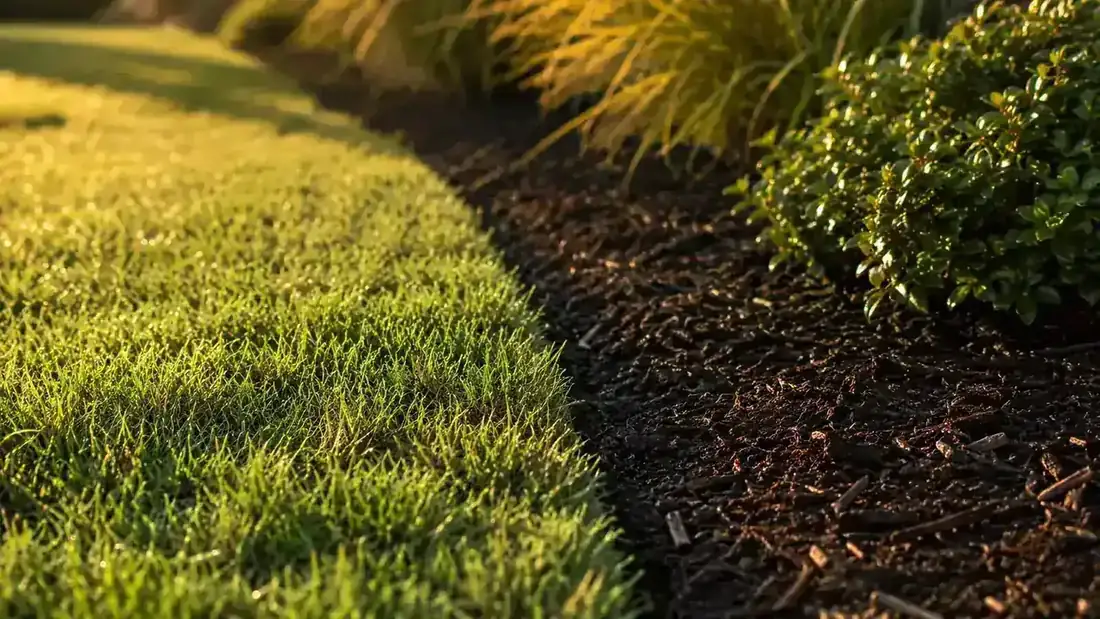
Let me tell you what took me an embarrassingly long time to figure out. For about four years, I was using my string trimmer to "edge" by holding it at a lazy angle and sweeping back and forth along the sidewalk. The lawn technically looked shorter near the edge, but it never looked crisp. It looked like I had trimmed around the borders in a hurry, which is exactly what I had done. The line between my grass and my concrete was more of a suggestion than a clean cut.
Then one spring afternoon a neighbor watched me at it and said, "You know you have to rotate the head, right?" I did not know. And that one sentence, plus eventually landing on the WORX 20V cordless trimmer with its built-in edger pivot, changed the way my yard looks for good. Clean lawn edges are not about buying a dedicated edger or spending more time on the job. They come down to technique: the right tool angle, the right pace, and a little consistency each week before the grass gets away from you. This guide walks through the full process step by step, starting with what you need and finishing with the kind of borders that make the whole yard look intentional.
Want edges this clean without a dedicated edger?
The WORX 20V cordless trimmer converts from string trimmer to lawn edger with a simple head rotation. No separate tool, no extra battery. It handles everything this guide walks through, on a single charge for most mid-size yards.
Amazon Check Today's Price on Amazon →Step 1: Charge the Battery and Check the Line Before You Go Outside
This sounds obvious but it is the step most people skip, and it makes the whole job worse when you skip it. A half-charged battery will cut your run time on the WORX 20V from around 30 minutes down to 15 or less, and you will notice the trimmer losing power just as you are getting to the back fence line. Plug in before dinner if you plan to edge in the morning.
While the battery charges, check the line. The WORX Command Feed system lets you advance line on demand with a button press, which is genuinely handy, but it cannot add line that is not there. Spin the head and take a look. You want at least two inches of line on each side of the head sticking out before you start. If you are working with nubs, take two minutes to wind on a fresh section. A trimmer with short line scalps edges rather than cutting them and leaves you with a patchy, burned look right where you want the sharpest definition.
Also put on closed-toe shoes and safety glasses. Pieces of gravel, small sticks, and chips of dried soil come off concrete at speed. This is not a helmet-and-body-armor situation, but eye protection is the one thing you do not want to skip. My neighbor Karen found that out the hard way on her driveway edge and will tell you about it if you give her the opening.
Step 2: Rotate the Trimmer Head to Edging Position
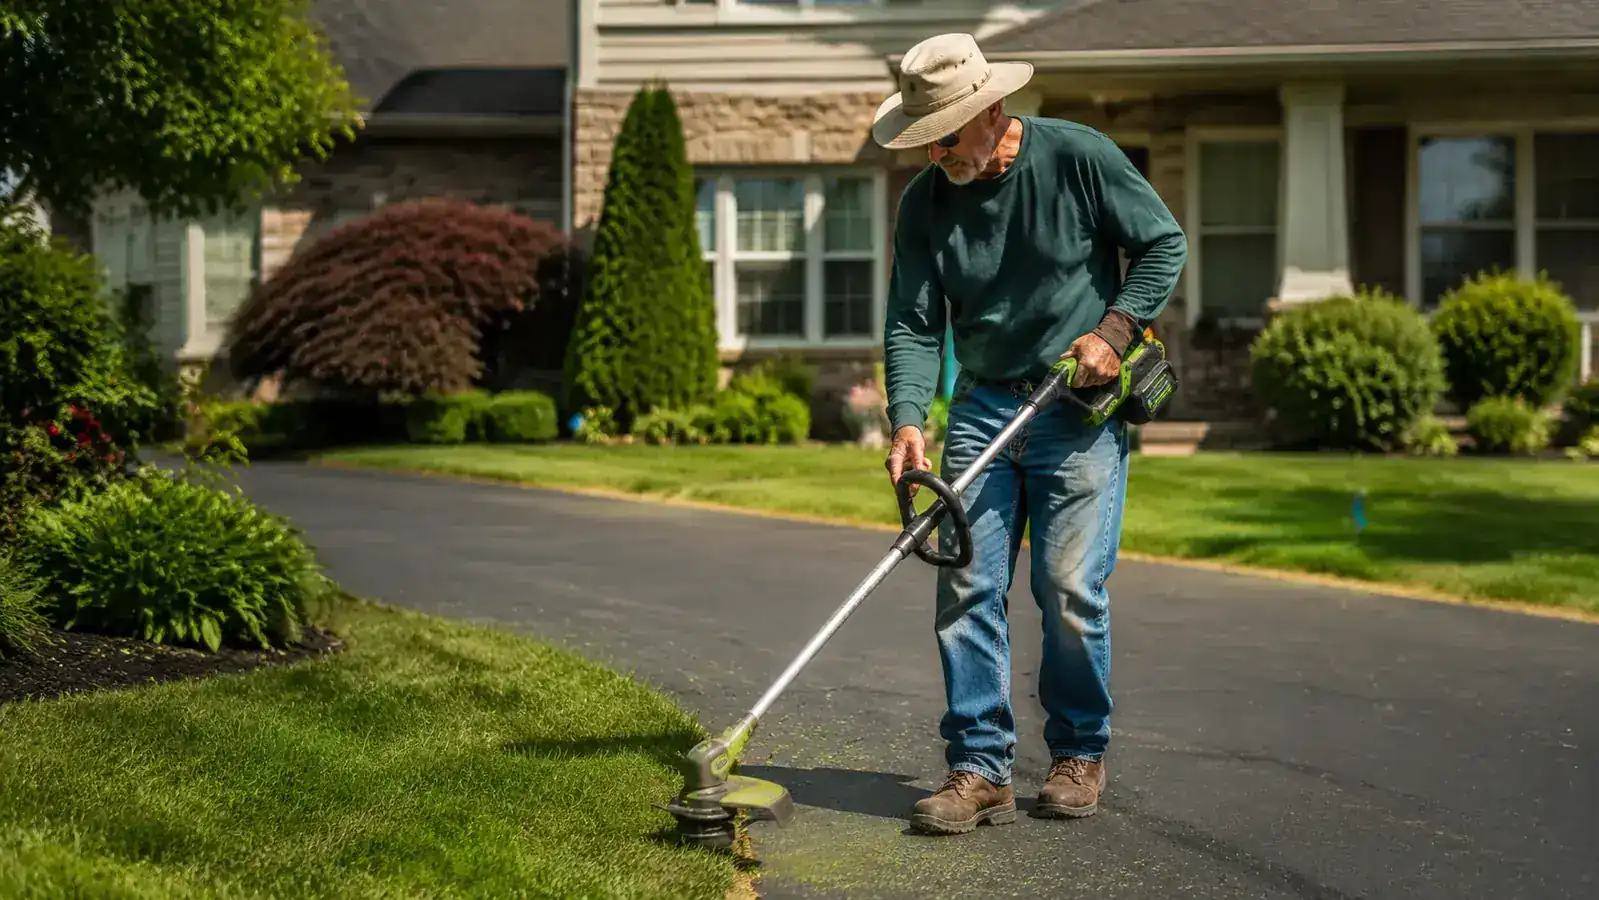
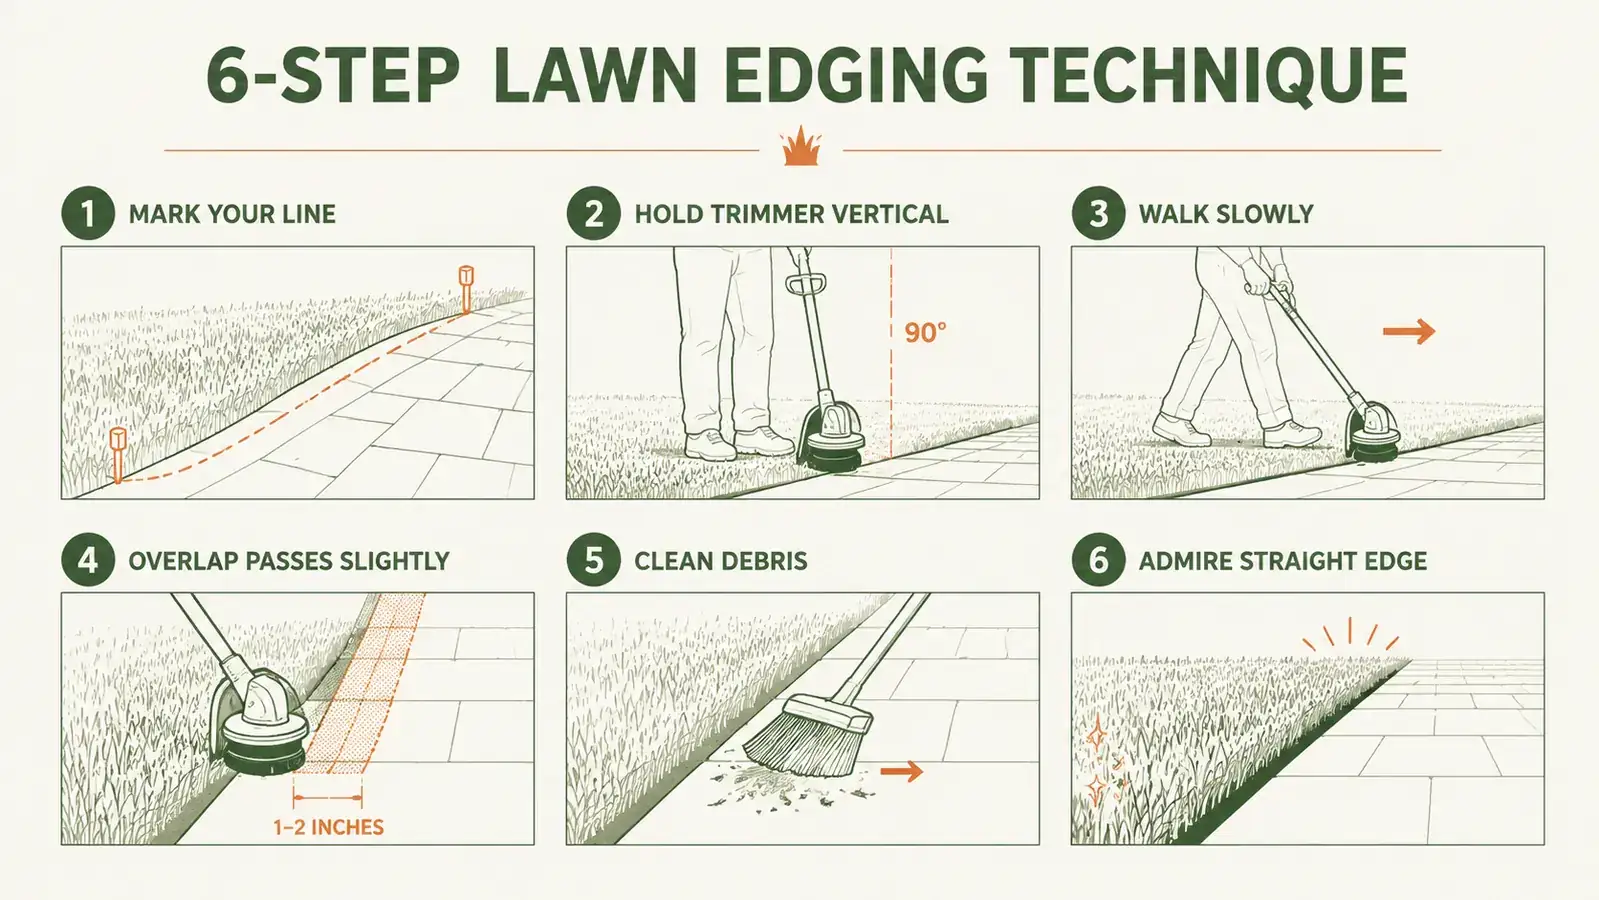
This is the step most homeowners skip entirely, and it is the single biggest reason their edges look rough. When the head is in the standard horizontal trimming position, the cutting line runs parallel to the ground and chops the tops of grass blades. That is what you want for trimming around tree trunks and fence posts. But for edging along a sidewalk or driveway, you need the line running vertically, perpendicular to the ground, so it slices a clean wall right where the grass meets the concrete.
On the WORX 20V, rotating the head is a one-step move: press the release button near the motor housing and pivot the head 90 degrees until it clicks into the edge position. The guard wing swings around with it and now acts as a guide wheel that rides along the concrete edge while the line cuts the grass wall beside it. Once that guide wheel is engaged, the machine is doing half the work of keeping you on the line. If your trimmer does not have a built-in edge position or guide wheel, you can still edge by rotating the entire tool body so the head runs vertical, but you will need to watch your line and pace more carefully.
Step 3: Find the Right Walking Speed and Cutting Depth
Walk too fast and you leave uncut tufts behind you, especially on thicker grass. Walk too slow and the line chews at one spot and tears more than it cuts, leaving a ragged wall. The sweet spot for most grass types is a steady walking pace, about the speed you would stroll through a parking lot on your way into a grocery store. Not leisurely, not rushed. Consistent.
As for cutting depth, the guide wheel or the edge of the head should just kiss the pavement surface. You do not want the line plowing into the concrete, which wears it down fast and throws debris at your shins. You also do not want it hovering half an inch above the surface, which leaves a lip of grass. Think of it as the line grazing the plane of the concrete rather than grinding into it. Watch the groove between the concrete and the grass for the first few feet and adjust the height of your arm hold until the line is slicing right at that seam.
On clay soil, which I have more than my fair share of, the ground can heave slightly from season to season and create small bumps along the edge. Slow down over those spots and let the trimmer work through them rather than muscling through at full pace. Forcing it on uneven surfaces is how the line breaks off prematurely and leaves you pressing the Command Feed button every thirty seconds.
Step 4: Work the Line Consistently Around Corners and Curves
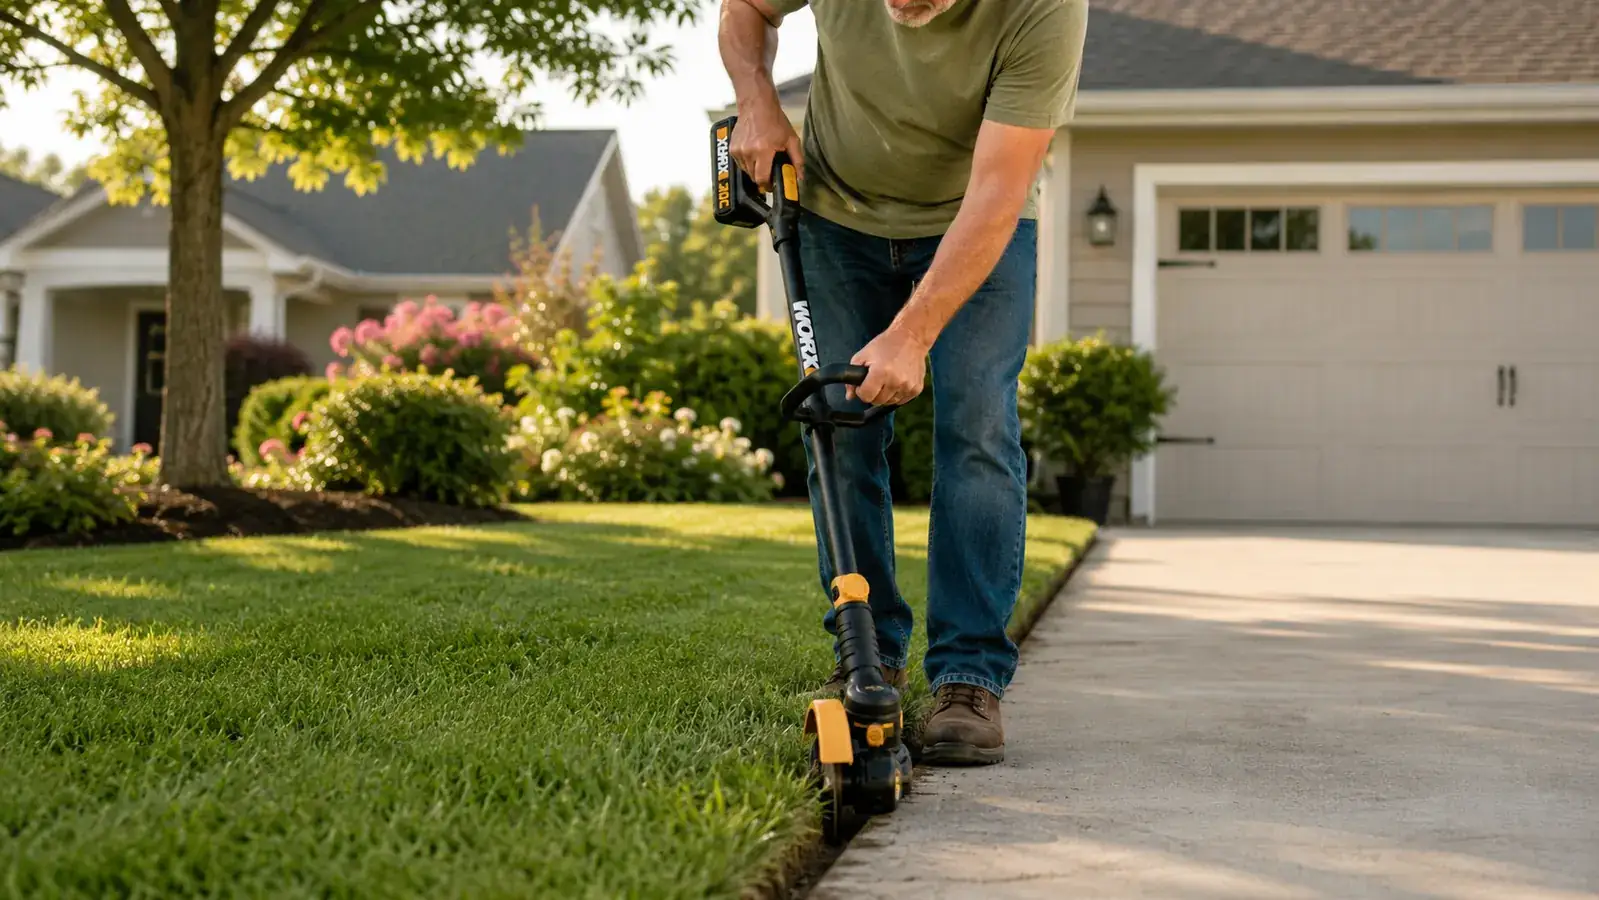
Straight runs along a driveway or sidewalk are easy once you have the head angle right. Corners and curves are where the results fall apart for a lot of people. At a 90-degree corner where a sidewalk meets a driveway, slow your walk to almost a stop and pivot the trimmer head through the corner in a short arc, keeping the guide wheel in contact with the concrete throughout. Do not try to cut the corner in one sweeping motion. Take two or three small overlapping arcs at reduced speed and you will get a clean, crisp right angle that looks intentional.
For curved garden bed borders, the technique is similar. Keep the guide wheel riding the harder edge (the stone border, the landscape edging strip, or the established soil line) and walk the curve at a steady pace. The WORX handle is light enough at around 5 pounds that you can hold it comfortably through even a long curved bed border without your arm giving out. That weight matters over a typical suburban yard. A gas trimmer at 8 or 9 pounds changes the equation considerably after the first two or three passes.
Step 5: Clean Up the Clippings and Reset the Edge for Next Time
Once you have finished the full perimeter, the sidewalk and driveway will have a light scattering of grass clippings along the edge you just cut. Do not leave them there. Clippings left on concrete can stain over time, especially on older concrete that has some texture to it. More practically, if rain comes before you sweep, those clippings can wash into the edge channel and start to pack down, which means next time the grass re-establishes right where you cleared it.
A simple push broom or a handheld leaf blower takes about two minutes to clear everything back onto the lawn. Blow or sweep parallel to the edge, not into it, so you are sending the clippings away from the channel you just opened. Then take one last look at the edge from a low angle. If there are spots where the grass wall is still ragged or where the concrete shows a jag, make a single slow pass with the trimmer still in edge mode and tidy them up before you put the tool away.
The key to maintaining clean edges over the season is frequency, not force. If you edge once a week during the growing season, each pass takes ten to fifteen minutes and the trimmer never has to fight through an overgrown lip. If you wait three weeks between passes, you will spend twice as long on each session and the results will be less clean because you are asking the line to remove too much grass at once. Once a week is the habit that makes it easy. Twice a month is the habit that makes it a chore.
What Else Helps
After edging, a quality grass seed or lawn fertilizer applied along the border area can help thicken the grass just inside the edge, which gives you a crisper, greener line to work against each week. Thin or patchy grass right at the edge looks ragged no matter how clean your cut is.
If you have a winding garden bed with no hard border, adding a plastic or metal landscape edging strip makes a permanent guide for the trimmer and eliminates guesswork on where the line should fall. It is a one-afternoon project and it pays dividends every week after. It also stops the bed from slowly expanding as grass creeps in and soil heaves.
For folks with sore knees or wrists, the WORX handle positions your wrist in a relatively neutral grip compared to older D-handle designs where the wrist ends up kinked sideways. That said, any repetitive task with vibrating machinery can aggravate wrist and elbow soreness over time. If that is a concern, a pair of anti-vibration gloves runs under $20 and makes a noticeable difference on longer sessions.
Finally, if the grass along your borders tends to grow back fast because it gets extra sun and water running off the hardscape, you can apply a narrow band of pre-emergent or growth regulator right along the edge in early spring. This is not something everyone needs, but if you are edging every week and still fighting visible regrowth by Wednesday, it is worth looking into.
Walk too fast and you leave tufts behind. Walk too slow and the line tears more than it cuts. The sweet spot is a steady grocery-store-parking-lot pace, and once you find it, the edges take care of themselves.
The WORX 20V trimmer with its edger pivot has been my go-to for two full seasons now. It starts every single time with no cord yanking and no fuel smell, which I appreciate more than I expected to. The battery charges overnight and handles a typical suburban perimeter plus the back fence line on a single charge. The guide wheel keeps the line where it belongs without me having to think about it. If you are using a straight-line trimmer without an edge mode, you can still make this technique work, but that guide wheel is a real quality-of-life upgrade when you are trying to maintain a clean line every week.
Good edges make the whole yard look cared for, even when nothing else is perfect. The flower beds can be a little rough, the lawn can have a thin spot or two, but if the borders along your sidewalk and driveway are crisp and clean, the yard reads as tended. That is a reasonable return on fifteen minutes a week and one solid technique change.
Ready to get those crisp edges? The WORX 20V does the trimming and the edging without swapping tools.
The WORX 20V cordless string trimmer rotates to a dedicated edge position in seconds, with a guide wheel that keeps your line straight without constant adjustment. Nearly 28,000 Amazon buyers. Check the current price before you buy.
Amazon Check Today's Price on Amazon →